Most Northern Lights photos fail not because the aurora wasn’t strong, but because photographers make the same avoidable mistakes. This in-depth guide reveals what professionals do differently—covering focus, timing, camera settings, composition, and mindset. Using real-life examples and expert-backed techniques, it shows how to consistently capture stunning aurora photos—even if you’ve failed before.
Why Northern Lights Photography Frustrates So Many People
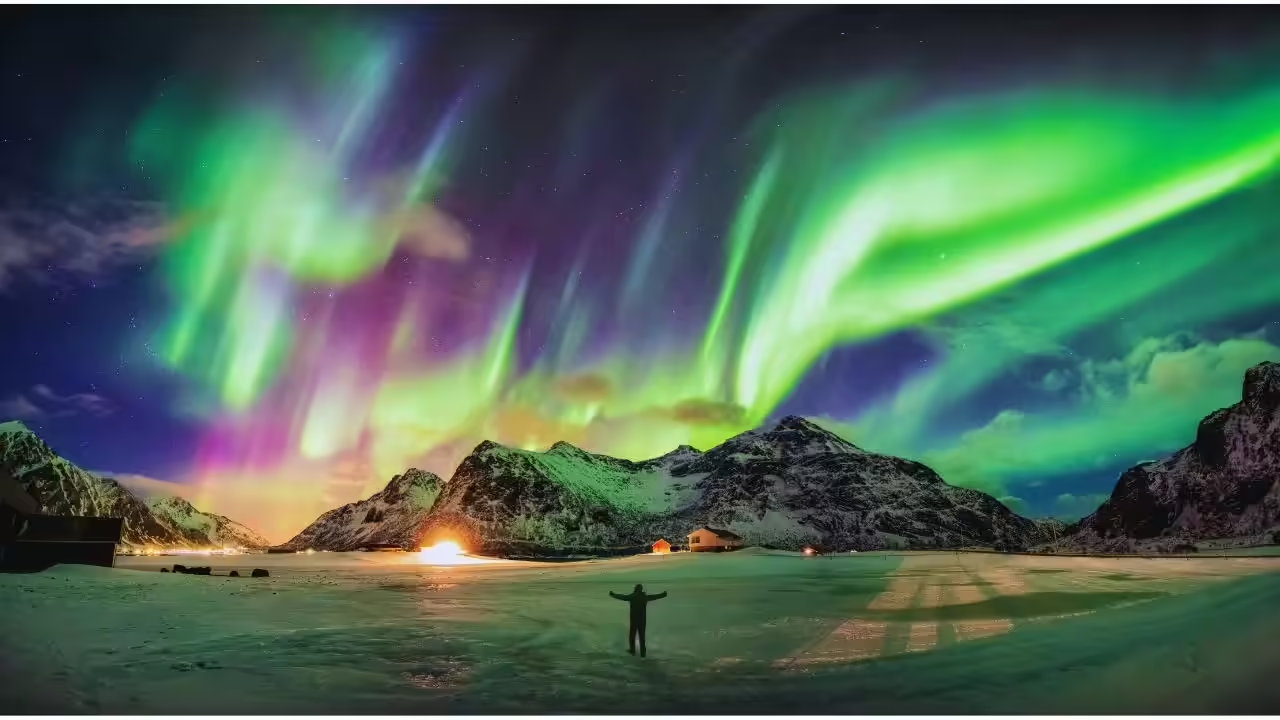
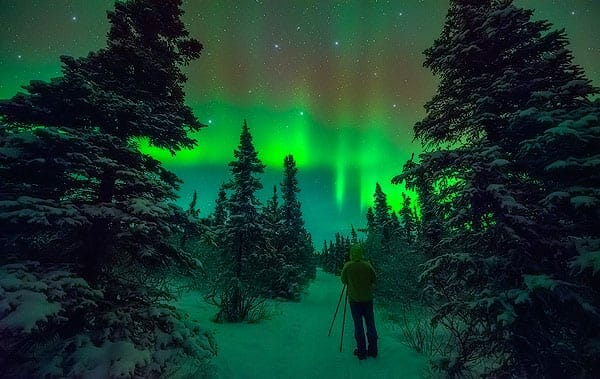
Standing beneath the Northern Lights is magical. The sky moves. Curtains of green ripple overhead. Purple and red flicker at the edges. In the moment, it feels unforgettable.
Then you check your photos.
The disappointment hits instantly.
Blurry stars. Muddy colors. A faint green haze that looks nothing like what you witnessed. For many Americans, this moment becomes the end of aurora photography altogether. They assume they lack skill, gear, or luck.
But that assumption is wrong.
The truth is far simpler—and far more encouraging.
Most people fail at Northern Lights photography because they were taught incomplete or misleading advice.
Online guides often focus on numbers instead of understanding. They list camera settings without explaining why they work. They emphasize brightness over motion. They promise results without addressing the realities of the night sky.
Professionals know better.
The Most Common Myth That Ruins Aurora Photos
The single most damaging belief in aurora photography is this:
“If the aurora is strong enough, any photo will look good.”
This myth ruins more shots than bad weather or cheap equipment.
Auroras are dynamic. They move, stretch, collapse, and reform constantly. Long exposures blur that motion. Autofocus misreads the scene. Cameras exaggerate brightness and hide mistakes on their screens.
As a result, even spectacular auroras can produce terrible photos.
Professional photographers don’t rely on aurora strength. They rely on control.
What Professional Aurora Photographers Actually Focus On
When experienced aurora chasers arrive at a location, they aren’t obsessing over color or brightness. Their priorities are very different.
They focus on:
- Sharp stars
- Clean horizons
- Foreground balance
- Sky clarity
- Aurora speed and structure
They treat the aurora like a moving subject, not a static light source. This mindset shift alone dramatically improves results.

The One Setting That Ruins More Northern Lights Photos Than Any Other
Ask a dozen experienced aurora photographers what mistake beginners make most, and you’ll hear the same answer every time:
Leaving autofocus turned on.
Autofocus systems need contrast and stable edges. Auroras provide neither. The camera hunts, locks incorrectly, and produces images that look “almost sharp”—the worst kind of sharpness.
Stars become soft dots. Aurora rays lose definition. The entire photo feels wrong, even if you can’t immediately explain why.
Professionals never trust autofocus at night.
They:
- Switch to manual focus
- Focus on a bright star
- Zoom in digitally to confirm sharpness
- Lock focus and never touch it again
Many even tape the focus ring in place.
If your stars aren’t pinpoints, the photo is already ruined—no matter how bright the aurora is.
Why Your Camera Screen Lies to You in the Dark
Another reason people think they succeeded when they didn’t is the camera’s rear screen.
At night:
- Screens appear brighter than reality
- Colors look stronger than they are
- Slight blur is hard to detect
Many photographers only realize their mistake at home, reviewing images on a larger display.
Pros check focus constantly by zooming in on stars during the shoot, not after.
Camera Settings That Actually Work (And Why)
Instead of rigid formulas, professionals think in ranges and relationships.
Reliable Starting Settings
- Aperture: f/2 to f/2.8
- ISO: 800–3200
- Shutter speed: 1–5 seconds
- Lens: Wide-angle (14–24mm ideal)
- Focus: Manual, locked on stars
From there, they adjust based on aurora motion, not brightness.
Fast-moving auroras require shorter exposures to preserve structure. Slower auroras allow slightly longer exposures.
Beginners often do the opposite—and lose detail.
Why Long Exposures Usually Make Aurora Photos Worse
Long exposures feel logical. More light should mean better photos, right?
Not with auroras.
Long exposures:
- Blur motion
- Remove texture
- Turn dynamic curtains into green fog
Professionals prefer:
- Slightly higher ISO
- Shorter shutter speeds
- Sharper structure
The goal isn’t brightness. It’s clarity.
Real-Life Example: Same Sky, Different Results
During a geomagnetic storm over the Midwest, two photographers stood side by side.
One used:
- 15-second exposures
- Low ISO
- Autofocus
The other used:
- 2-second exposures
- Higher ISO
- Manual focus
The result was dramatic.
One photographer captured soft, washed-out images. The other captured sharp rays, visible motion, and defined structure.
Same aurora. Same moment. Completely different outcome.
Why Composition Matters More Than Color
Another mistake beginners make is pointing the camera straight up and hoping for drama.
Strong aurora photos tell a story.
They include:
- Foreground elements
- A horizon line
- A sense of place
Without context, even bright auroras look flat.
That’s why iconic aurora photos often feature:
- Trees or mountains
- Shorelines or lakes
- Cabins or silhouettes
The aurora becomes more powerful when it interacts with something earthly.
Choosing Foregrounds Without Ruining the Scene
Foregrounds should enhance—not dominate.
Good foregrounds:
- Are naturally dark
- Provide scale
- Frame the sky
Avoid:
- Artificial lighting
- Flashlights
- Headlights
- Over-lighting trees or rocks
Natural darkness preserves mood and realism.
Timing: Why Most People Leave Too Early
One of the most searched questions in the U.S. is:
“What time is best to photograph the Northern Lights?”
The honest answer: Later than most people expect.
Auroras frequently peak:
- Between 11 PM and 3 AM
- Often after midnight
Many people leave early because:
- The aurora starts faint
- Cold becomes uncomfortable
- They expect instant brilliance
Professionals stay longer. They understand that auroras often build slowly—and peak briefly.
Weather Matters More Than Aurora Strength
A strong aurora forecast means nothing under clouds.
Professionals prioritize:
- Clear skies
- Darkness
- Then solar activity
They would rather shoot a moderate aurora under clear skies than a strong storm under haze.
Cloud forecasts often matter more than Kp numbers.
Why Smartphones Sometimes Seem Better Than Cameras
This confuses many beginners.
Phones often capture auroras more clearly because they:
- Stack images
- Enhance brightness
- Hide focus errors
But phones sacrifice:
- Fine detail
- Natural color
- Dynamic range
Dedicated cameras outperform phones—only when used correctly.
The Mental Shift That Separates Pros From Everyone Else
The biggest difference between average and exceptional aurora photographers isn’t equipment.
It’s mindset.
Professionals don’t hope for auroras.
They prepare for them.
They:
- Scout locations during daylight
- Plan compositions in advance
- Set focus early
- Lock settings before activity begins
When the aurora appears, they’re ready—not scrambling.
Practical Pro Tips You Can Use Immediately
Do This Next Time You Go Out
- Scout your location before dark
- Set focus during twilight
- Lock manual focus
- Take test shots early
- Dress warmly so discomfort doesn’t rush you
Comfort increases patience.
Patience increases success.
Is This the Best Time in Years for Northern Lights Photography?
According to NASA and NOAA, yes.
We are currently in Solar Cycle 25, which is stronger than early predictions and expected to peak between 2024 and 2026. This increases:
- Frequency of aurora events
- Southern visibility in the U.S.
- Multi-night aurora sequences
The opportunity is there. Technique is the missing piece.
Frequently Asked Questions (Trending Searches)
1. What camera is best for Northern Lights photography?
Any camera with manual controls and good low-light performance.
2. What lens should I use?
Wide-angle lenses between 14–24mm with fast apertures.
3. Why are my aurora photos blurry?
Autofocus errors, long exposures, or camera movement.
4. What ISO works best?
Usually ISO 800–3200 depending on brightness.
5. How long should my shutter speed be?
1–5 seconds for active auroras.
6. Can I shoot auroras with my phone?
Yes, but results will be limited.
7. Do auroras look like photos in real life?
They’re often dimmer but more dynamic.
8. Is a tripod really necessary?
Yes. Absolutely essential.
9. Can editing fix bad aurora photos?
Editing helps—but can’t fix blur or bad focus.
10. Why do my photos look mostly green?
Green is the easiest auroral color for cameras to detect.
Final Takeaway: You Haven’t Failed—You’ve Been Misinformed
Most people don’t fail at Northern Lights photography because they lack talent.
They fail because:
- They trusted autofocus
- They used overly long exposures
- They left too early
- They expected instant results
Fix those mistakes, and your success rate improves dramatically.
The aurora doesn’t reward luck.
It rewards preparation.